Our Pick: Honey Lake
Check PriceHow to Install a Package of Bees, Step by Step
Installing a package of bees takes about ten minutes and requires exactly one act of courage: pouring roughly ten thousand bees out of a screened box into your hive. Everything else is preparation, and preparation is what this guide is for. Before install day you need a fully assembled hive ready on its stand, a spray bottle of 1:1 sugar syrup, a feeder filled and waiting, and your protection on. If the hive is not built yet, a complete kit like the Honey Lake 10-frame Langstroth starter ($159.99) gets you there in one box, and we walk through the whole ready-by-arrival checklist below.
By The BeehiveKits Hive Desk2026-08-2818 min read Fact-checked against verified Amazon listingsHow we research
A package is the starting-from-zero format: no comb, no brood, no stores, just bees and a caged queen who has never met them. That means your job on install day is to get the cluster into the box gently, position the queen cage so the colony can release her slowly through the candy plug, and start feeding immediately so the bees can begin drawing the comb that everything else depends on. We cover both installation methods, the classic shake-in and the lower-drama walk-in, and we tell you honestly when each one makes sense.
This guide pairs with the rest of our getting-bees cluster: where to buy bees covers ordering and pickup logistics, how to install a nuc covers the five-frame alternative that skips most of the drama here, and how to start beekeeping is the full first-year map. Standard disclosure, plainly: no brand paid to appear here, and some links go to Amazon, where a purchase may earn us a small commission at no extra cost to you. Prices were verified at publication and drift; check the live listing.
What to know
- A package is about 3 pounds of loose bees, roughly 10,000 workers, plus a caged queen and a syrup can. It starts with zero comb and zero brood, so feeding from day one is not optional.
- Install in late afternoon or early evening so the bees settle overnight instead of drifting, and mist the cluster lightly with 1:1 syrup before you open anything: fed, damp bees are calm bees.
- The queen ships in a cage with a candy plug for a reason: the colony eats through it over 2 to 4 days, which paces her release to match their acceptance of her. Do not release her by hand on day one.
- Shake-in gets all the bees into the hive in one confident pour; walk-in sets the open package in the hive and lets bees move onto frames themselves. Both work, shake-in is faster, walk-in is gentler on nerves.
- Check queen release at day 3 to 5 (cage empty, remove it, close up) and do your first real inspection at day 7 to 10, looking for eggs, not the queen herself.
- Feed 1:1 syrup continuously until the brood box is mostly drawn comb, typically four to eight weeks. An underfed package builds slowly and sometimes absconds.

Honey Lake 10-Frame Langstroth Beehive Starter Kit
Honey Lake · 10-frame Langstroth · beeswax-coated wood · frames and foundation included (listed)
Our verdict: The install-day hive problem is completeness: a package needs a full brood box, frames, covers, and a reduced entrance on day one. This kit ships the whole stack with foundation in the frames and a beeswax coating that skips the painting step, so the week between ordering and bees is enough.
A package cannot wait on backordered frames, and the Honey Lake 10-Frame Langstroth starter kit ($159.99) is our benchmark precisely because nothing essential is missing: boxes, ten frames with foundation, inner and outer covers, and a bottom board, in beeswax-coated wood that can sit in weather immediately.
Standard Langstroth dimensions mean the queen cage hangs between frames exactly as described above and every feeder and super you add later fits. The full ranked field, including 8-frame and budget alternatives, is in our starter kit guide and the 10-frame roundup.
Who should buy it
Anyone with a package on order and no hive on a stand yet: it is the shortest reliable path from empty yard to package-ready apiary.
What we don't like
Assembly is required and the instructions are thin, so build it the weekend it arrives, not the night before pickup. Air the coated wood outdoors for a few days before install.
- Configuration
- 10-frame Langstroth (listed)
- Material
- Beeswax-coated wood (listed)
- Frames/foundation
- Included (listed)
- Assembly
- Required
- Price
- $159.99
Pros
- Complete package-ready stack in one box
- Beeswax coating skips painting before install week
- Standard dimensions fit queen cages, feeders, and future supers
- Frames and foundation actually included
Cons
- Thin assembly instructions
- Needs a stand and entrance hardware planned separately

Foxhound Bee Co Half-Gallon Entrance Feeder
Foxhound Bee Co · Half-gallon capacity · entrance-mounted · no hive opening to refill (listed)
Our verdict: For the first weeks after a package install, the best feeder is the one that never makes you open the hive: this entrance feeder shows its level at a glance and swaps jars in seconds, exactly the near-zero disturbance a settling colony wants.
The feeding weeks after a package install are a disturbance-minimization game, and the Foxhound Bee Co half-gallon entrance feeder ($33.99) plays it well: the jar rides at the entrance where you can see the syrup level from the kitchen window and refill without smoke, suit, or opening a box mid-introduction.
Entrance feeders earn their robbing reputation in late-summer dearths, not in spring when packages go in, but keep the entrance reduced and refill cleanly regardless. When robbing season arrives or your apiary grows, graduate to the top feeders ranked in our feeder guide.
Who should buy it
New package owners in their first feeding month who want to monitor and refill syrup with zero hive openings.
What we don't like
Half a gallon empties fast under a hungry package, so expect refills every day or two at peak draw, and retire it to the shed during dearth-season robbing risk.
- Capacity
- Half gallon (listed)
- Mount
- Hive entrance
- Refill
- No hive opening required
- Price
- $33.99
Pros
- Syrup level visible without opening anything
- Ten-second refills during the introduction period
- Cheap enough to run one per hive
Cons
- Small capacity means frequent refills
- Wrong tool during dearth-season robbing

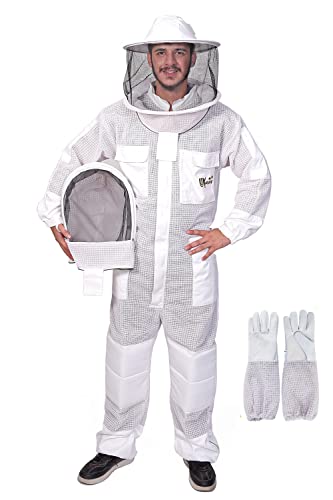
USKEEPERS 3-Layer Ventilated Bee Jacket
USKEEPERS · 3-layer ventilated mesh · jacket with veil · listed sting-proof construction
Our verdict: Package installation is upper-body work: pouring, hanging a queen cage, seating frames. A ventilated 3-layer jacket covers everything the job exposes, keeps you cool enough to move slowly, and costs and stores like half a suit.
Steady hands come from not flinching, and the USKEEPERS 3-layer ventilated jacket ($79.99) buys the not-flinching: spacer mesh deep enough that stingers run out of reach, real airflow for a spring afternoon, and a clear veil for the moment you are eye-to-eye with the queen cage.
Jacket versus full suit is a judgment call we map honestly in jackets and gloves; for install day and routine inspections a jacket with jeans is plenty, and the full suits in the suit guide are there when you want maximum coverage.
Who should buy it
New beekeepers who want serious upper-body protection with less bulk, heat, and cost than a full suit for install day and routine inspections.
What we don't like
Legs are on their own, so pair it with thick pants and closed boots; order by the size chart because loose fit is part of the protection.
- Type
- Jacket with hood/veil
- Construction
- 3-layer ventilated mesh (listed)
- Best for
- Installs and routine inspections
- Price
- $79.99
Pros
- 3-layer mesh stops most stings outright
- Cooler and cheaper than a full suit
- Fast on and off for short visits like the queen check
Cons
- No leg coverage
- Sizing runs loose by design; check the chart
What a package of bees actually is
A package is bees sold by the pound, and the standard unit is a 3-pound package: roughly 10,000 worker bees scooped from strong production colonies, a mated queen in her own small cage with a few attendant bees, and a can of sugar syrup to feed everyone in transit. The whole thing ships or rides home in a screened box about the size of a shoebox, and the hum coming off it in your back seat is a sound you will remember for years.
The detail that shapes everything on install day: the queen is not related to the workers. Package producers shake bees from several colonies and add a queen raised separately, so on day one she is a stranger the colony would likely kill if she were dropped loose among them. The cage is her protection during the introduction period, and the candy plug in its end is the timer that releases her only after the colony has had a few days to accept her pheromone. University extension programs like Penn State's Beekeeping 101 teach this same slow-release logic, and it is the single most important thing to not improvise on.
A package also starts with nothing: no drawn comb for the queen to lay in, no stores, no brood to anchor the bees to the box. That is why packages run three to four weeks behind a nucleus colony, and why the two jobs after installation are feeding heavily and leaving them alone. If you have not committed to a format yet, our where to buy bees guide compares packages, nucs, swarms, and splits with honest pricing, and the nuc install guide shows the gentler alternative.
Before pickup day: the ready-by-arrival checklist
Everything about install day gets easier if the apiary is finished before the bees exist. The hive should be fully assembled, painted or coated and aired out, and sitting level on its stand at its permanent location. You want a single deep brood box with all ten frames in it, an entrance reducer set to its smallest opening, and covers on. A complete kit like the Honey Lake 10-Frame Langstroth starter kit ($159.99) covers the woodenware list in one purchase, with frames and foundation included and a beeswax coating that skips the painting weekend; the full field of options is ranked in our starter kit guide.
Stage the consumables too. Mix a batch of 1:1 sugar syrup (equal parts white sugar and water, by weight or volume) and load some into a clean spray bottle that has never held chemicals. Fill your feeder and have it at the hive, not in the kitchen. Lay out your hive tool, a pushpin or small nail for the candy plug step, and a rubber band or queen-cage holder if your cage style needs one. Then dress for success: install day is a fine day for full protection while your hands learn, and a ventilated jacket like the USKEEPERS 3-layer ventilated bee jacket ($79.99) is the sweet spot of coverage and mobility for a job done mostly from above. More options in jackets and gloves.
Pickup and the ride home
Most packages are picked up in person on a scheduled day, and the pickup yard is controlled chaos: hundreds of humming boxes, a line of trucks, and someone with a clipboard. When you collect yours, look before you leave. A healthy package has a tight, calm cluster hanging together with at most a small scattering of dead bees on the floor of the cage; a layer of dead bees more than a bee or two deep is worth flagging to the supplier on the spot. Check that the queen cage is visible and that she is alive and moving.
Transport the package in the passenger compartment, not a hot trunk, out of direct sun and away from the heater vents. Bees in transit die of heat, not cold: a cool, ventilated, slightly boring ride is perfect, and a towel under the box keeps stragglers off the upholstery. Do not stop for a long lunch with the package in a parked car. If the drive is long and the day warm, a light misting of water through the screen at a rest stop cools and calms them.
Plan to install the same day if you possibly can, in the late afternoon or early evening. Installing near dusk means the bees settle into the hive, find the feeder, and cluster for the night instead of taking orientation flights into the sunset and drifting to your neighbor's yard.
If you cannot install right away
Weather happens. A package can be held for a day or two, sometimes three, with minimal losses if you keep it cool, dark, and fed. Put the box in a garage or basement at roughly 50 to 70 degrees, dim, and out of drafts. Twice a day, mist the screen lightly with 1:1 syrup, a few passes, not a soaking; the bees will strip the droplets off the screen and each other. The shipping syrup can is usually running low by the time you get the package, so this misting is genuinely feeding them, not just a courtesy.
What you are protecting during a hold is the queen and the cluster's energy. Every day in the cage costs stores and bees, so hold only as long as the weather forces you to. A cool, drizzly install beats a third day in the garage: bees can be installed in surprisingly marginal weather as long as it is above roughly 50 degrees and not pouring, because the cluster keeps itself warm once it is in the box. What you should not do is open the package indoors to check on things. It is exactly as bad an idea as it sounds.
The syrup spray: thirty seconds that changes everything
Just before you open anything, give the package a light spray of 1:1 syrup through the screen: three or four passes on each screened side, until the bees glisten slightly. Wait a minute. What happens next is the whole trick of package installation: the bees stop flying-minded and start grooming, licking syrup off themselves and each other, and a cluster busy eating is a cluster that pours like damp popcorn instead of exploding like confetti.
Keep the spray light. You want misted bees, not soaked bees; a drenched cluster chills easily and drowning bees in syrup helps no one. Skip the spray entirely in cold weather, below roughly 55 degrees, when wet bees cannot warm themselves, and shake the extra flight out of them with the thump described below instead. On a normal spring afternoon, though, the spray is the difference between the calm installs you see in videos and the swirling clouds beginners fear.
Opening the package and freeing the queen cage
Set the package on end next to the hive. Pry off the thin wooden or plastic lid covering the syrup can; under it you will find the top of the can and, hanging beside it, a strap or tab holding the queen cage. Here is the sequence that avoids the classic beginner fumble: give the package one firm thump on the ground so the cluster drops in a heap to the bottom, then lift out the syrup can, immediately fish out the queen cage by its strap, and set the lid loosely back over the hole. The thump buys you several seconds of open hole with almost no bees boiling out, and the loose lid keeps it that way while you work.
Now look at the queen. She is the long-bodied bee in the small cage, usually with a few attendants. Confirm she is alive and walking; a dead queen on arrival is rare and every reputable supplier replaces one, but you need to know before the bees are in the box. Brush or gently shake the clinging workers off the cage, back toward the package. Then find the candy end: one end of the cage is plugged with a cork or cap over white sugar candy. Remove the cork from the candy end only, and if the candy looks rock-hard, pierce it once with a pushpin, not all the way through, to give the bees a start. The cork on the opposite end stays put forever; pulling the wrong cork releases the queen instantly into a colony that does not know her yet.
Hanging the queen cage
The queen cage goes into the middle of the action, between the center frames of the brood box, candy end up. Candy-up matters for a mundane reason: if an attendant dies in the cage, she falls away from the exit instead of corking it shut with her body. Wedge the cage between the top bars of frames four and five, screen face exposed to the gap so workers can reach the queen to feed her and take her pheromone, or strap it to a frame face with a rubber band. It should hang snug enough that it cannot fall to the floor of the hive.
Pull one frame from the edge of the box and set it aside before you do this, so there is room to work and, in the shake-in method, room for the pour. What you are building is a target: an open slot in the middle of the box with the queen hanging beside it, so the bees you pour land near her, smell her, and start organizing around her within minutes. The colony that clusters on the queen cage tonight is a colony that has already decided to stay.
Method one: the shake-in
The classic install, taught in nearly every beginner class, and faster than your pulse says it will be. With two or three center frames out of the brood box to make a gap, pick up the package, pull the lid fully off the syrup hole, invert the package over the gap, and pour. Shake firmly, side to side and up and down; the cluster slides out in ropes and heaps into the hive. Pause, thump the package on your palm to drop the stragglers, and shake again. Getting 90 percent of the bees out is success; chasing the last few hundred is not required.
Set the nearly empty package on the ground in front of the hive, hole facing the entrance, and the remainder will walk in over the next hours, drawn by the queen's scent. Now the gentle part: ease the removed frames back into the box, lowering them slowly so bees flow out of the way rather than getting crushed, until all frames are home and correctly spaced around the hanging queen cage. Bees give way to slow steady pressure; they cannot give way to a dropped frame.
Add your feeder, close the hive up, and confirm the entrance reducer is at its smallest opening. You are done, and the entire pour-to-closed sequence took less time than reading this section. Walk away and let ten thousand bees introduce themselves to their new address.
Method two: the walk-in
The walk-in trades speed for serenity, and it is a legitimate choice, not a beginner's cop-out. Instead of pouring, you remove four or five frames from one side of the brood box, set the whole package down in the cavity with its top hole open, hang the queen cage beside it as usual, and close the hive over everything. The bees walk out of the package and onto the frames on their own schedule, usually overnight, gathered around the queen by morning.
Come back the next day or the day after, lift out the empty package box, gently slide the missing frames back into place, and close up. The costs are minor but real: your hive runs a day or two short on frames (bees sometimes begin free-form comb in the open space if you dawdle, so do not leave the box in past day two), and you make one extra visit. The benefit is that nobody pours anything, which for some new beekeepers is the difference between an install that happens this week and one that gets postponed twice.
Feeding after install: the syrup engine
A package on bare foundation is a construction crew with no lumber, and syrup is the lumber. Bees convert nectar or syrup into beeswax at a steep exchange rate, several pounds of syrup per pound of comb, and until comb exists the queen cannot lay a single egg. So the feeder goes on at install and stays full for weeks: 1:1 syrup, refilled before it runs dry, until the brood box is mostly drawn comb or a strong natural flow makes the bees ignore the feeder. For a package that typically means four to eight weeks of steady feeding, and the colonies that get it draw comb at double the pace of the ones that get syrup when their keeper remembers.
Feeder choice is mostly about refill disturbance and robbing risk. An entrance feeder like the Foxhound Bee Co half-gallon entrance feeder ($33.99) is the friction-free option for a new package: the jar sits outside the hive where you can see the syrup level from across the yard and swap jars in ten seconds without opening anything, which is exactly the level of intrusion a settling colony wants. Its known weakness, inviting robbers in a dearth, is at its lowest in spring when packages are installed; once robbing season arrives, or if you run more than a couple of hives, a top feeder carries more syrup with less exposure. The full comparison, including our top-feeder pick, is in the bee feeder guide.
Two feeding rules that save packages: never let the feeder sit dry during comb-building, because a hungry package is the classic absconding setup, and never spill syrup around the hive at refill time, because nothing draws robbers and ants faster. Refill in the evening if you can.
Day 3 to 5: the queen release check
Three to five days after install, make one short, surgical visit: is the queen out of her cage? Suit up, use little or no smoke, open the top, and lift out the cage. If it is empty, perfect. Remove it entirely, push the frames back together to close the gap it occupied, and close up. Leaving the empty cage in the hive earns you a wad of burr comb built around it and nothing else.
If the queen is still in the cage at day 5, the candy was too hard or too deep. You have two sane options: pierce the remaining candy with a pin so the workers finish the job within hours, or release her directly, and direct release is safe by now if the workers on the cage are calm. The tell is body language: workers feeding her through the screen and walking calmly on the cage means she is accepted, so open the non-candy end and let her walk down between the frames. Workers biting the screen and clinging aggressively mean the colony has not accepted her yet; re-hang the cage and check again in two days.
Resist the urge to turn this visit into an inspection. No frame-by-frame review, no hunting for the queen in the crowd, no rearranging. In and out in five minutes; the colony is mid-introduction and every extra disturbance risks the acceptance you are trying to protect.
Day 7 to 10: the first real inspection
A week to ten days after install, do your first true inspection, and go in looking for one thing above all: eggs. Single eggs standing in cell bottoms, one per cell, like grains of rice on end, are the proof that the queen is out, alive, mated, and working. You do not need to find the queen herself, and as a beginner you often will not; eggs mean she was on that comb within the last three days, which is all the confirmation that matters. Expect two to four frames with some drawn comb, a patch of eggs and maybe young larvae at the center, and syrup being stored around the edges.
While you are in, read the rest quickly: comb being drawn straight on the foundation (correct any crooked early comb now by pushing frames tight together), syrup stores accumulating, and a laying pattern that is filling in. Then close up and get back on a 7-to-10-day rhythm. The full skill of reading frames, brood patterns, and warning signs is its own craft, and we teach it start to finish in how to do a hive inspection, with the weekly cadence mapped in the first-year calendar.
Troubleshooting: the five package problems and their fixes
Dead queen in the cage. Rare, and every reputable supplier replaces her free if you report it promptly. Install the package anyway; a queenless package holds together for days on the cage's residual pheromone, and the replacement queen goes in the same way. Absconding. A package that vanishes in week one almost always left because of an empty feeder, a reeking brand-new hive (air out strong coatings before install), or constant disturbance. Feed continuously, and some keepers add a queen excluder under the brood box for the first week as cheap insurance; once there is brood in the comb, the colony is anchored and the excluder comes off.
Bees clustered outside the hive after install. Usually harmless orientation and crowding on a warm evening; they move in by morning. Crooked comb. Caught at the first inspection, fixable in seconds by nudging frames tight together and rotating the offending frame; caught a month later, it is a demolition job. This is why frames go back tight and centered on install day. Laying workers. The late-stage sign of a colony queenless for weeks, multiple eggs per cell laid on cell walls, and by far the hardest fix on this list, which is exactly why the day 7-10 egg check exists: it catches queen failure while the fix is still easy.
Zoom out and the failure modes share one shape: a package fails from too little food or too little patience. National surveys tracked by the Bee Informed Partnership put annual colony losses near 40 to 50 percent, and new-keeper losses trend worse, but almost none of that happens on install day. Feed them, check the release, confirm eggs, then manage them like any colony: the inspection rhythm, the varroa monitoring covered in when to treat for varroa, and the season plan in the first-year guide.
How to Install a Package of Bees
- 1
Set up the hive before the bees arrive
Fully assemble a single deep brood box with all frames, set it level on its stand at its permanent location with the entrance reducer at the smallest opening, and stage 1:1 sugar syrup, a clean spray bottle, a filled feeder, and your protective gear.
- 2
Transport the package cool and install the same day
Carry the package in the passenger compartment out of direct sun, keep it cool and ventilated, and plan to install in late afternoon or early evening the same day. If weather forces a delay, hold the package in a cool dark room and mist the screen with 1:1 syrup twice daily.
- 3
Mist the bees with 1:1 syrup
Just before opening, lightly spray the screened sides of the package with 1:1 sugar syrup until the bees glisten, then wait a minute. Bees busy grooming and feeding pour calmly and fly far less. Skip the spray below roughly 55 degrees.
- 4
Remove the syrup can and retrieve the queen cage
Thump the package firmly on the ground to drop the cluster, pry out the syrup can, lift the queen cage out by its strap, and set the lid loosely back over the hole. Confirm the queen is alive and brush clinging workers back toward the package.
- 5
Prepare the candy end of the queen cage
Remove the cork or cap from the candy end only, leaving the plain cork in place, and pierce hard candy once with a pin without breaking through. The workers will eat through the candy over 2 to 4 days, releasing the queen only after they have accepted her.
- 6
Hang the queen cage between the center frames
Wedge or rubber-band the cage between the center frames of the brood box, candy end up, with the screen face exposed so workers can feed the queen through it. Remove two or three center frames first to create a gap for the pour.
- 7
Shake the bees into the hive
Invert the package over the gap and pour with firm shakes until roughly 90 percent of the bees are in, then set the nearly empty package in front of the entrance so stragglers walk in. Alternatively, use the walk-in method: set the open package inside the box overnight and remove it the next day.
- 8
Rebuild the frames and close up
Lower the removed frames back into the box slowly so bees move out of the way, space all frames evenly and tight around the queen cage, install the filled feeder, close the hive, and confirm the entrance is reduced.
- 9
Feed 1:1 syrup continuously
Keep the feeder full without interruption until the brood box is mostly drawn comb, typically four to eight weeks. An empty feeder during comb-building slows the colony badly and is the leading cause of absconding.
- 10
Check queen release at day 3 to 5
Make one brief visit to confirm the queen is out of her cage, then remove the empty cage and push the frames back together. If she is still caged, pierce the remaining candy, or release her directly if workers on the cage are calm and feeding her.
- 11
Inspect for eggs at day 7 to 10
Do the first full inspection a week to ten days after install, looking for single eggs centered in cell bottoms as proof the queen is laying. Correct any crooked comb, confirm syrup stores, then return to a 7-to-10-day inspection rhythm.
More gear worth comparing
Beyond this guide: the highest-rated gear across every category and budget, with a live price check on each.


As an Amazon Associate we may earn from qualifying purchases, at no cost to you.
Quick shop: every pick
Skip the scroll: the whole lineup, with a live price check on each.
- Honey Lake 10-Frame Langstroth Beehive Starter KitBest Hive to Receive a PackageHoney Lake · $159.99Check Price
- Foxhound Bee Co Half-Gallon Entrance FeederBest Install-Day FeederFoxhound Bee Co · $33.99Check Price
- USKEEPERS 3-Layer Ventilated Bee JacketBest Protection for Install DayUSKEEPERS · $79.99Check Price
Key terms
- Package
- Bees sold by weight, standardly 3 pounds (roughly 10,000 workers), shipped in a screened box with a separately raised caged queen and a syrup can. Starts with no comb, brood, or stores, which is why immediate continuous feeding matters.
- Queen cage
- The small screened cage the queen ships in with a few attendant bees. It protects her from workers who have not yet accepted her and meters her release through the candy plug over 2 to 4 days.
- Candy plug
- The white sugar candy sealing one end of the queen cage. Workers eat through it from outside over several days, timing the queen's release to their acceptance of her pheromone. The cork over the candy end is removed at install; the other cork never is.
- Direct release
- Opening the queen cage and letting the queen walk onto the comb immediately, rather than waiting for the candy release. Safe only once workers show acceptance behavior: feeding her through the screen and walking calmly on the cage.
- Absconding
- The whole colony abandoning the hive, the package-specific failure mode. Driven by empty feeders, strong chemical smells in new equipment, or constant disturbance during the settling period. Brood in the comb anchors a colony and ends the absconding window.
- Drawn comb
- Foundation the bees have built out into full-depth wax cells, ready for eggs and stores. A package must draw its comb from scratch on a syrup engine, which is why it runs three to four weeks behind a nuc.
- 1:1 syrup
- Equal parts white sugar and water by weight or volume, the standard spring feed that mimics nectar and fuels comb-building and brood rearing. Fed continuously to a new package for four to eight weeks.
- Laying workers
- Workers whose ovaries activate after weeks of queenlessness, laying multiple unfertilized eggs per cell, often on cell walls. A late-stage emergency that early egg checks are designed to prevent.
Questions, answered
How many bees are in a 3-pound package?
Roughly 10,000 workers, at the common estimate of about 3,500 bees per pound, plus one mated queen in her own cage. That sounds like a lot until you see them in a hive: a strong summer colony runs 40,000 to 60,000 bees, which is why a package spends its first two months building population before it does anything else.
What time of day should I install a package of bees?
Late afternoon or early evening. Bees installed near dusk settle into the hive, find the feeder, and cluster overnight instead of taking flights and drifting. Morning installs work but lose more bees to wandering. Same-day installation beats holding the package whenever weather allows.
How long until the queen is released from her cage?
Typically 2 to 4 days for the workers to eat through the candy plug. Check at day 3 to 5: if the cage is empty, remove it; if she is still inside, pierce the remaining candy with a pin, or release her directly if the workers on the cage are calm and feeding her through the screen rather than biting at it.
Should I release the queen immediately instead of waiting?
No, not on install day. The workers and queen are strangers, and a queen released before the colony accepts her pheromone is frequently balled and killed. The candy plug exists to pace the release over the 2 to 4 days acceptance takes. Direct release is reasonable only at the day 3-to-5 check, and only if worker behavior on the cage is calm.
Do I need a smoker to install a package?
Not really. Smoke works on colonies with comb and stores to defend, and a package has neither; a light misting of 1:1 sugar syrup through the screen does the calming job better by giving the bees something to eat and groom. Have the smoker lit if it steadies you, but the spray bottle is the primary tool of install day.
How long should I feed a new package of bees?
Continuously from install until the brood box is mostly drawn comb or a strong nectar flow makes the bees ignore the feeder, typically four to eight weeks of 1:1 syrup. Comb costs several pounds of syrup per pound of wax, and an interrupted feeder both slows the buildout and raises the odds of absconding.
Why did my package of bees leave the hive?
Absconding in week one traces to a short list: an empty feeder during comb-building, strong smells from brand-new or freshly treated equipment, relentless disturbance, or no anchor of comb and brood yet. Feed without gaps, air out new hives before install, and stay out except for the release check. Once brood is in the comb, the colony is effectively anchored.
When should I do the first inspection after installing a package?
Two visits: a five-minute queen-release check at day 3 to 5 where you remove the empty cage and nothing else, then the first full inspection at day 7 to 10, where the goal is finding eggs, single eggs centered in cell bottoms, as proof the queen is laying. Finding the queen herself is optional; eggs are the evidence that counts.
Is a package or a nuc better for a beginner?
A nuc is more forgiving: it arrives as a functioning colony on five frames with a laying queen, brood, and stores, and runs three to four weeks ahead of a package. Packages are cheaper, ship more widely, and teach you more on day one. If you can get a locally raised nuc, we recommend it; our nuc install guide and where-to-buy-bees guide cover that path.
Can I install a package in cold or rainy weather?
You can, within reason. Above roughly 50 degrees and not pouring, an install beats holding the package another day, because the cluster warms itself once it is in the box. Skip the syrup spray in cold weather so bees do not chill wet, work fast, and get the feeder on. Below that, hold the package cool and dark, misting syrup twice daily, and wait for the window.
Filed under Explainer
Part of How-To Guides
Keep reading
How to Install a Nuc
The five-frame alternative: transfer an established mini colony in ten calm minutes, no pouring required.
Where to Buy Bees
Packages, nucs, swarms, and splits compared, with ordering windows, honest price ranges, and supplier vetting.
How to Do a Hive Inspection
The 10-minute inspection your new colony needs every 7 to 10 days, frame by frame.
The Best Bee Feeders
Entrance, top, and frame feeders ranked for the syrup-heavy first season.
How to Start Beekeeping
The complete first-year plan this install day sits inside, from winter ordering to spring survival.
The Best Beehive Starter Kits
Every hive we would put a colony in, ranked, for the box your package is about to call home.